Home » Auto saw » How To Change A Mitre Saw Blade: A Comprehensive Guide
How To Change A Mitre Saw Blade: A Comprehensive Guide
As an Amazon Associate, I earn from qualifying purchases.
If you own a mitre saw, it is important to know how to change the blade when it gets dull or damaged. A worn blade does not only affect the quality of your cuts, it can also be dangerous to use. Luckily, replacing a mitre saw blade is a relatively easy process that you can do on your own. In this guide, we will show you how to change a mitre saw blade step-by-step.
How To Change A Mitre Saw Blade?
Materials Needed
Before starting the process, make sure you have the following materials:
A new mitre saw blade that matches the specifications of your saw
A wrench that fits the bolt on your saw’s arbor
Safety goggles
Thick gloves
Step 1: Unplug the Saw
The first and most crucial step when changing a mitre saw blade is to unplug the saw from the power source. This is important to avoid any accidents or injuries when working on the blade.
Step 2: Raise the Blade Guard
To access the blade, you need to raise the blade guard by pulling it up and back towards the handle of the saw. Make sure the guard stays in this position throughout the blade changing process.
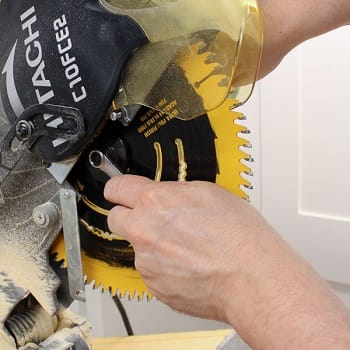
Step 3: Loosen the Blade Bolt
Use the wrench to loosen the bolt that holds the blade in place. Turn the wrench counter-clockwise to loosen the bolt, and be careful not to damage the teeth of the blade while doing so.
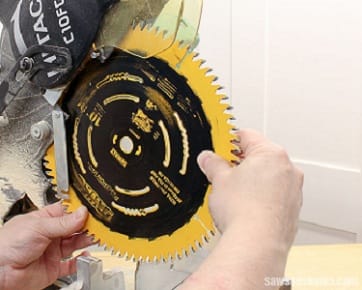
Step 4: Remove the Blade
Once the bolt is loose enough, remove it completely and take out the old blade. Be sure to handle the blade with thick gloves to avoid any cuts or injuries.
Step 5: Install the New Blade
Place the new blade on the arbor, making sure that the blade teeth are facing downwards. Tighten the bolt by turning the wrench clockwise until it is snug, but be careful not to over-tighten it as this may damage the blade or the arbor.
Step 6: Lower the Blade Guard
Once the blade is securely in place, carefully lower the blade guard back into position. Make sure it sits flush against the saw and that it moves freely up and down.
Step 7: Test the Blade
Before using the saw, it is important to test the blade to make sure it is properly installed and secured. Plug the saw back in and turn it on. Gradually increase the speed of the blade and listen for any unusual noises or vibrations. If everything sounds and feels normal, you are ready to use your newly installed blade.
Tips And Caution
Always use a blade that matches the specifications of your saw
Keep the blade clean and free of any debris
Do not remove the blade guard while the saw is in use
Do not touch the blade with your bare hands
Conclusion
Changing a mitre saw blade may seem daunting at first, but with these simple steps, you can do it safely and easily. Remember to unplug the saw, raise the blade guard, loosen the bolt, remove the blade, install the new blade, lower the blade guard, and test the blade. By following these steps, you can ensure that your mitre saw is always ready for your next project.